How-to: In brief
1
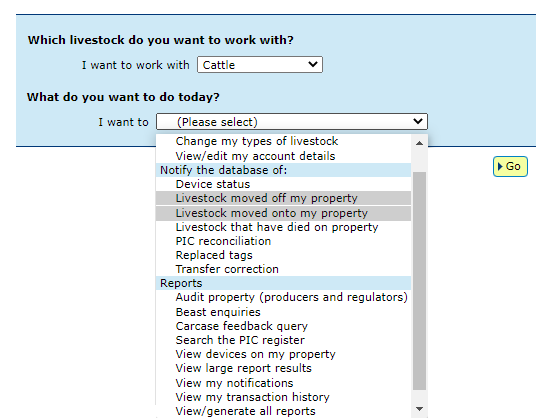
Select species and “Livestock moved off my property” or “Livestock moved onto my property” > Go
2
Select "Type in details" and then enter details in the compulsory fields > Continue
3
Confirm all details and then submit > Send
How-to: Step-by-step
Step 1
Once logged in, select the species you are working with. Under the ‘notify the database of:’ section select the action 'Livestock moved off my property' or 'Livestock moved onto my property'. Click 'Go'.

Step 2
Click ‘type in the details’ and then enter details in the compulsory fields (marked with a red star). Click 'Continue'.

*QUICK TIPS:
- When manually entering NLIS ID or RFID numbers ensure there is one number per line, as per the example. For RFIDs, leave a space after the first three digits e.g. 982 000025884234.
For more Quick Tips, click the Help buttons for each field to see a pop-up window of information relevant to that question.
Step 3
Confirm all details you have entered are correct, and then submit the information to the database by clicking 'Send'.

Step 4
The database will provide a receipt on screen. It’s recommended to record the Upload ID or to 'Print this receipt' for reference.
QUICK TIP: To ensure the transfer was received by database, click ‘View my transaction history’ to check the status of your ‘Upload ID’ is marked as Complete. If another status is shown, you will need to read the generated email for specific details about the outcome. These other status notes may be:
- Warning: the transfer is complete but a tag or tags were marked with a message that you will need to investigate / review.
- Error: One or more tags were not able to be moved and need your review / investigation.
- Failure: Technical issues occurred with the database and the movement was not completed.
- Bad Format: There were errors in the preparation of the .csv file. Review and contact ISC Customer Service on 1800 683 111.

*QUICK TIP: Record the Upload ID provided after each transfer. If details are incorrectly submitted, you will need to immediately conduct a Transfer correction action. This action only amends details of the previous transfer and will request the Upload ID of that transfer. If you notice an error in earlier transfers and need to correct it, contact ISC Customer Service on 1800 683 111.